Overview
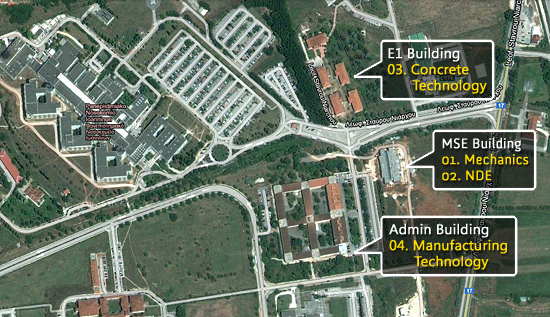
The MSS-NDE Laboratory facilities are hosted within the Materials Science & Engineering (MSE) Department of the University of Ioannina, Greece, and are spread in the MSE, E1 and Administration buildings.
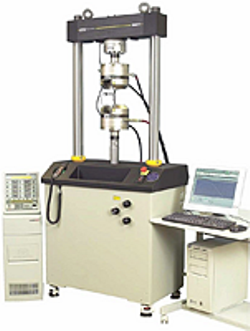
Dynamic servo-hydraulic system INSTRON 8800
Dynamic ±100 kN servo-hydraulic mechanical system INSTRON 8800 for cyclic loading, dynamic bending and fracture mechanics testing, max frequency 1 kHz.
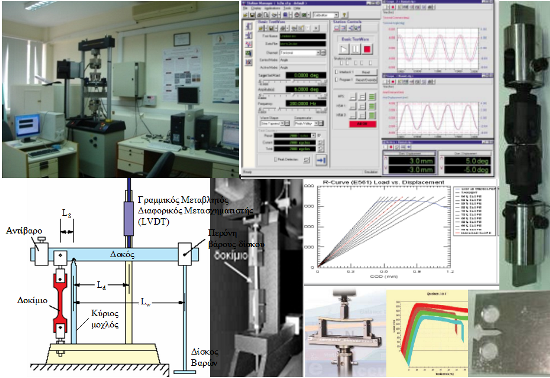
Applications:
- Mechanical Fatigue (ASTM E606, Ε466)
- Three-point Dynamic Bending (ASTM C293, C1161, C1341)
- Fracture Mechanics Testing:
4-point bending ASTM C1609/C1609M
Fracture Toughness (K1C), ASTM E399, Ε1820
J1C integral, ASTM Ε813, Ε1737
R Curve , ASTM E561
Crack Growth Rate, ASTM E647
COD ASTM E1290 - Creep test (ASTM E139)
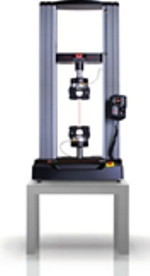
Electro-mechanical testing system INSTRON 5960
Electro-mechanical dual column tabletop testing system INSTRON 5960, max load 30 kN, for performing a variety of static testing procedures (tensile, compressive, bending, creep, friction, relaxation) through load control (load cell), displacement control (position sensor), or deflection control (external LVTD). Flat specimens of width up to 25 mm and thickness up to 6.4 mm, or cylindrical specimens with diameter 3.2 mm to 7.8 mm, can be tested.
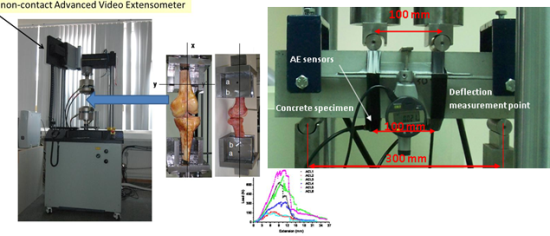
Advanced Video Extensometer
The electro-mechanical testing system is also equipped with an Advanced Video Extensometer for non-contact 2-D strain measurements (elasticity modulus, Poisson’s ratio). A high resolution digital camera and advanced real-time image processing are used to make precise strain measurements on material test samples.
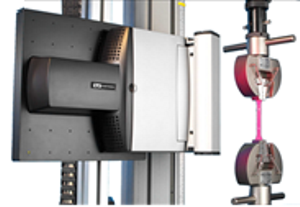
Applications:
- Tension / Compression
Metals - ASTM E8, BS EN 10002, ISO 6892
Ceramics - ISO 15733, ISO 15490, ISO 17561
Polymers - ASTM D638
Composites - MIL-HDBK-17, ISO 527 - Four-point Bending – deflection control (ASTM C78, C1018)
- Creep (ASTM E139)
- Bio-mechanics testing using 5 KN and 10 ΚΝ load cells and custom designed specimen holders
Erosion Testing
To be completed
Mid-wave Infrared Thermography system
Complete IR thermography and stress analysis system of high sensitivity using a JADE thermal camera from CEDIP with InSb detector with Focal Plane Array 320x240 elements (ITR 30 μm), spectrum response of 3.6-5.0 μm, and thermal sensitivity less than 25mK at 25°C. It can measure the temperature, surface stress, and dissipated thermal energy of a material with thermal analysis of 0.001°C. The lens of the IR camera has a 50 mm focal length and spatial resolution of 35μm and can measure temperatures up to 1200°C in real time. The system operates in three basic modes:
- Live
- Lock-in
- Stress analysis
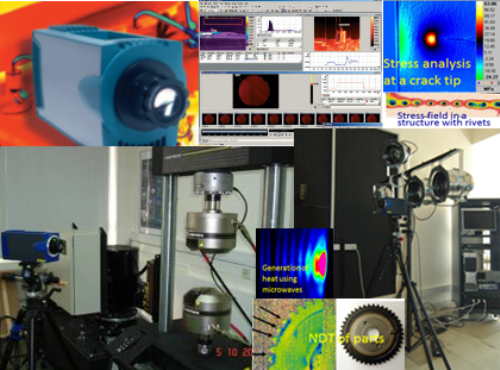
This system, with custom add-ons in our laboratory, is able to perform the following measurement techniques:
- Determination in real time of stress and phase for differentiating between tensile and compressive stresses
- Measurement of thermal dissipated energy during the fatigue testing (lock-in mode with a dynamic mechanical testing machine)
- Optical Lockin Thermography for synchronizing the IR camera with periodic or random thermal loading (using a function generator Tektronix AFG3102 2CH-100MHz) induced in the material using four halogen lamps (PAR64 1000W OSRAM), a digital oscilloscope (Tektronix DTS1012B 2CH-100MHz 1.0GS/s) and a dimmer (PULSAR Rackpack 6x10A)
- Ultrasonic Thermography, allowing for defect selective imaging using thermal waves excited by high power ultrasonic elastic waves
- Induction Thermography, which is active thermography using electromagnetic excitation.
Applications of IR Thermography:
- Stress analysis at a crack tip
- Stress field in a astructure with rivets
- Generation of heat using microwaves
- NDT of parts
Long-wave IR Thermal Camera
FLIR ThermaCAM T360 thermal camera with Focal Plane Array 320x240 detector (78.000 pixels), spectral range 7.5 to 13μm, and Thermal Fusion functionality for the characterization of large-scale structures. Examples of industrial applications in spotting anomalies before a break down occurs are: production process supervision, measurement of heat development electrical and mechanical devices, detection of blocked pipe work and insulation defects, energy monitoring in buildings, damage assessment in monuments of cultural heritage.
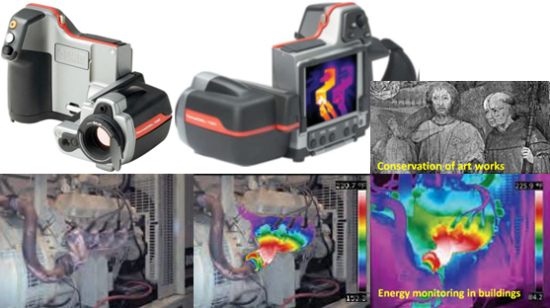
Ultrasonic System
Single bridge ultrasonic immersion system (Physical Acoustics) with 3 computer controlled axes (x, y, z) and manual gimbal and swivel, 1μm step size, computer controlled P/R, high-speed A/D converter with 100Msps digitizing rate, and multiple software gates: A-, B-, and C-scans, PE/TT modes, pulsed and tone burst elastic waves, contact ultrasound for material bulk elastic property characterization, Lamb wave scanning, and a wide selection of immersion and contact transducers of various frequency ranges.
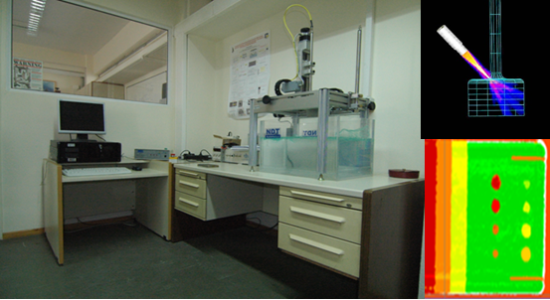
Scanning Acoustic Microscopy
Scanning Acoustic Microscopy system for nondestructive evaluation and measurement of near surface local elastic property. The system includes: Highly focused 50MHz transducer (Panametrics V390-SU/RM) with a delay of 19.5 μsec and 13 mm focal length, pulser / receiver 1 kHz - 75 MHz (Panametrics 5073PR) unit with 39dB RF gain, and A/D Converter card 8 bit 1.5 GHz.
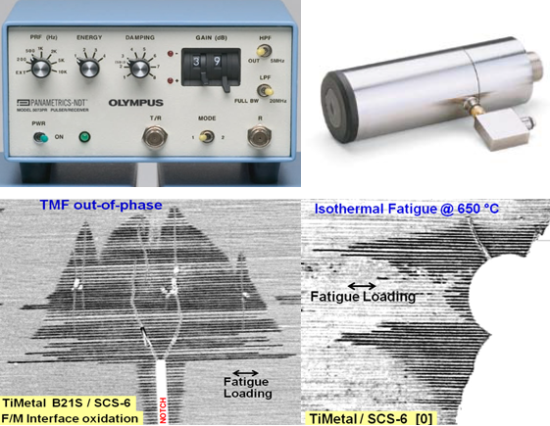
Nonlinear Acoustics System
Nonlinear acoustics system for measuring higher order elastic constants and evaluating the state of damage in materials and structures, The system consists of a linear high power tone-burst Pulser/Receiver (RITEC RPR-4000) operating in two standard modes (Pulse-Echo and Through Transmission), with high power RF tone burst synthesizer of bandwidth 250 kHz - 7 MHz delivering RF pulses up to 8 kW RMS @ 1% Duty Cycle, phase-sensitive superheterodyne receiver providing the ability to extract otherwise undetectable signals from the noise, capable of making measurements using a single transducer with the internal diplexer, power filters for various excitation frequencies, high pass and low pass filters for the harmonics, and 150 Ohm termination.

The system is completed with a high speed A/D Converter card with a sampling rate of 100 MHz, MITEQ linear narrow band IF amplifiers (5MHz and 10 MHz), MITEQ band pass filters (5MHz and 10 MHz) at 100W, high power MITEQ band pass filter (5MHz), dual channel function generator Tektronix AFG3102 100MHz, 2-channel HP digital oscilloscope, and custom designed and fabricated Lithium Niobate (LiNbO3) piezoelectric transducers.
Acoustic Emission Systems
Physical Acoustics 8-channels Acoustic Emission system, 16 bits resolution, sampling rate: 3MSamples/sec per channel and acoustic signal bandwidth: 1 kHz – 400 kHz, AEwinSM8 software capable of real time measuring the characteristic parameters of AE signals as per ASTM E1316-2005 (timeout threshold voltage, amplitude, duration, energy, rise time, counts, etc.), three-dimensional location software, PICO ultra-mini sensors and R15A 150 kHz sensors.

Physical Acoustics 2-channels Acoustic Emission system with AEWIN PCI2-2 card, pre-amplifiers, NOESIS PRO and UTIA Enterprise software for analysing AE signals, and AE sensors.
Laser Doppler Vibrometer
Polytec Laser Doppler Vibrometer for non-contact measurements of out-of-plane displacement in materials and structures during mechanical testing. Applications include non-contact Acoustic Emission measurements in harsh environment and non-contact determination of material acoustic nonlinearity.
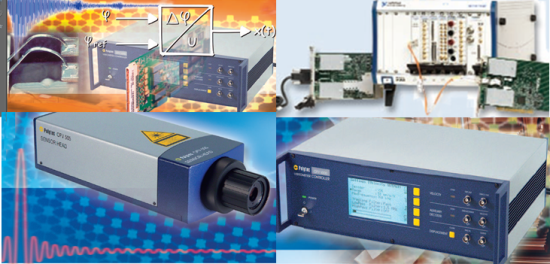
The system consists of:
- OFV-5000 Modular Vibrometer Controller, allowing for frequency (from near DC to 24 MHz), velocity and displacement measurement capabilities to be tailored to particular applications
- VD-09 Digital Velocity Decoder, with velocities to ± 10 m/s, 8 broadband measurement ranges (5mm/s/V - 1000mm/s/V) , 0 – 2.5 MHz bandwidth, 6 low-pass filtered ranges and maximum acceleration 9,600,000 g
- DD-900 Digital Displacement Decoder, based on state-of-the-art DSP technology with a displacement resolution of 15 pm, capable of measuring displacements from the sub-nanometer to meter range, with 0 – 2.5 MHz bandwidth, 10 m/s maximum velocity, and 16 measurement ranges
- DD-300 Digital Displacement Decoder, which allows measurements of vibrations and pulse displacements with amplitudes up to 75 nm (peak) in a frequency range of 30 kHz to 24 MHz with resolution of 0.1 pm/Hz½ at 100% reflectivity. It can make amplitude measurements on ultrasonic transducers, detect ultrasonic pulses (laser ultrasonic receiver for NDE) and measure fast transient motion on MEMS devices. Furthermore, a special technique which suppresses low frequency (acoustic) vibrations allows high frequency measurements in a normal environment without the clutter and distraction of ambient vibrations
- OFV-505 Vibrometer Sensor Head with low power, visible, eye-safe (Class 2) Laser providing outstanding optical sensitivity, with remote focus control with focus memory and auto focus capability
- National Instruments PXI-1031 data acquisition system with a PXI-5105 8-channels 12-Bit 60 MS/s Digitizer card, and custom software
Electrical Measurements
Electric measurements are performed using Keithley’s 5½-digit Model 6517B Electrometer/High Resistance Meter. The instrument has <20µV burden voltage on lowest current ranges, 200TΩ input impedance, <3fA bias current, up to 425 rdgs/s, 0.75fA p-p noise, built-in ±1kV voltage source, and unique voltage reversal method for high resistance measurements. It offers full autoranging over the full span of ranges on current, resistance, voltage, and charge measurements:
- Current measurements from 1fA to 20mA
- Voltage measurements from 10μV to 200V
- Resistance measurements from 50Ω to 1016Ω
- Charge measurements from 10fC to 2μC
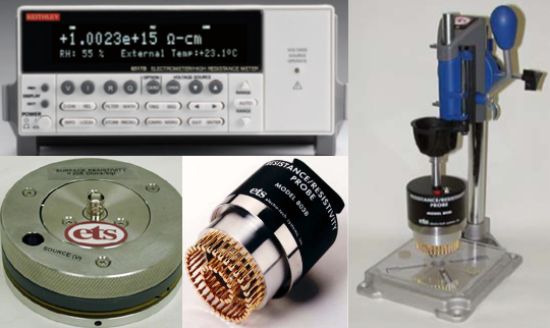
The system is completed with custom-built Resistance/Resistivity Probe and test fixture from Electro-Tech Systems Inc. (ETS) for measuring surface and volume resistance in a variety of materials. The probe has spring-loaded, stainless steel electrodes with conductive rubber on which constant force can be applied through specially designed press. Planar and non-planar samples as well as multilayer layer materials can be measured. Resistivity conversions from x1 - x1000 can be achieved.
Fiber Bragg Grating (FBG) sensor measurement system
The system is based on the sm130 Optical Sensing Interrogator from Micron Optics Inc., featuring a high power, high speed swept wavelength laser, realized with Fiber Fabry-Perot Tunable Filter technology. The interrogator core employs high speed hardware peak detection, optimized for rapid data acquisition of many simultaneous FBG sensors. The combination of high speed and excellent repeatability enables a single interrogator to simultaneously monitor dynamic sensors and measure static sensors with ultra-high resolution.
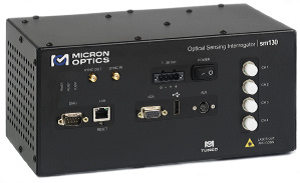
Features of the system include:
- Two optical channels
- Wide wavelength swept laser supporting more sensors per channel (FBG capacity 80 nm per channel)
- Scan frequency 100 Hz
- Internal peak detection
- Spectral Diagnostic View for optimizing sensor system setup and operation
- Automated measurement of distance to sensor locations
- Ten strain sensors with double connectors, two temperature sensors and one accelerometer sensor
Micron Optics ENLIGHT Sensing Analysis Software is used providing a single suite of tools for data acquisition, computation, and analysis of optical sensor networks. ENLIGHT combines the useful features of traditional sensor software with the specific tools needed to optimize optical properties during the design, implementation, and operations phases of an optical sensor system.
Optical Characterization
Optical characterization is performed using a Leica DM-4000M 1000x optical microscope, with bright field, dark field, polarization, inverse differential interference) and image processing software. It includes Eyepieces HC PLAN S 10x/25 Br. M and flat achromatic objective lenses suitable for bright field, dark field, polarization and fluorescence: N PLAN objectives 5x, 10x, 20x, 50x, 100x.
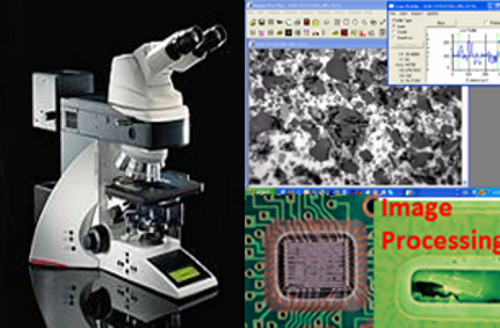
A digital camera Leica DFC425 C is used to capture images or video to computer for image analysis using xxx with a resolution of 5 Mpixels, aircooled (peltier) CCD sensor 0.5", pixel size 2.77 μm x 2.77 μm, sequential scanning, color filter RGB, color analysis 3x12 bits, exposure time 1 msec – 600 sec, 14 bit A/D signal converter, dynamic range > 58 dB, amplification 1x-10x, and shading correction.
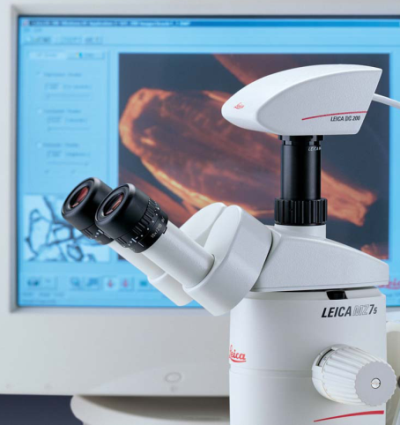
For large working areas a Leica MZ75 high-performance 100x stereo microscope is used with zoom 7.9:1, ErgoTube™ 10° – 50°, transmitted-light (bright field) and focusing drive (coarse/fine).
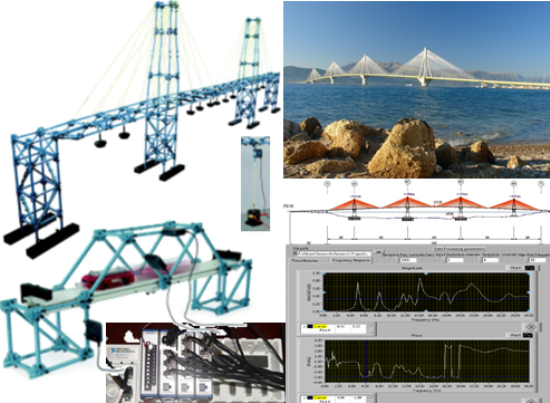
Cable Stayed Bridge model
Using PASCO’s stayed bridge model and National Instrument data acquisition system, students can study the structure’s static and dynamic behavior, modal analysis and damage detection (Bridge Structural Health Monitoring).
Specimen fabrication
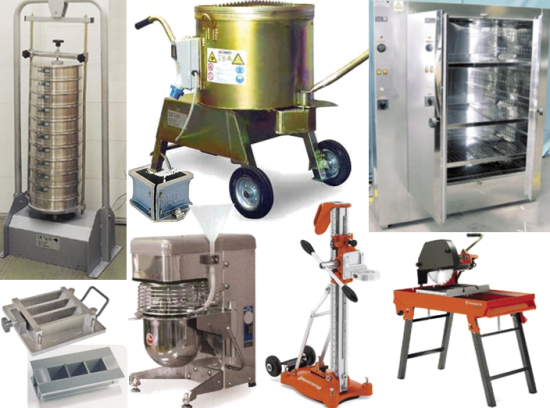
- 100 lt and 50 lt mixers for concrete and 5 lt mixer for mortar and cement paste
- 440 lt furnace for drying aggregates
- Automatic sieving machine and complete set of sieves as per ASTM standard
- Vibration tables 100x100 cm and 50x50 cm
- Molds for concrete specimens of various geometry: 100x100x400 mm, 100x100x500 mm (for bending tests), 200x200x200 mm, 150x150x150 mm, 100x100x100 mm (cubic), 150x300 mm (cylindrical)
- Molds for mortar specimens of various geometry: 70.7x70.7x70.7 mm, 50x50x50 mm, 40Χ40Χ40 mm (cubic), 40Χ40Χ160 mm (for bending tests)
- Table-top cutter
- Cutter core barrel 100x210 mm, tube Φ100
Mechanical systems
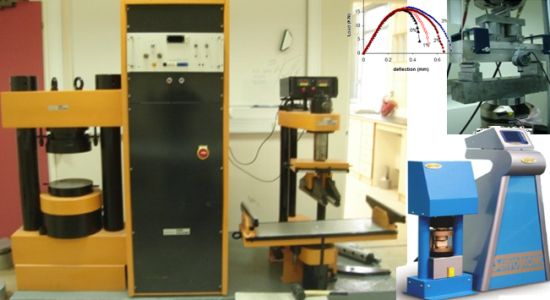
- Mechanical system TONI TECNICK for concrete testing, loading up to 3000KN (compression tests) and 250KN (bending tests)
- Mechanical system MATEST for mortar and paste testing, loading up to 250KN (compression tests) and 15KN (bending tests)
- Custom built four point bending apparatus able to perform flexural testing under deflection control for determining the toughness of short fiber-reinforced concrete in accordance with the standards ASTM C78 and ASTM C1609/C1609M
Balances
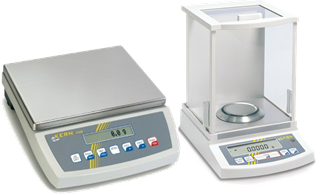
Balances 60kg and 30kg with accuracy 1g, 6.5kg with accuracy 0.1g capable of density measurement, closed balance 220g with accuracy 0.1mg.
Curing chamber
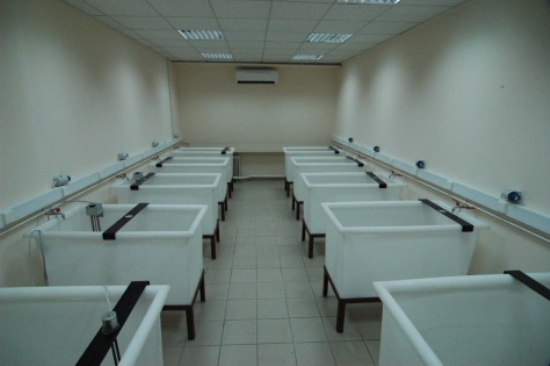
Chamber with stable temperature and humidity conditions for curing mortar and concrete specimens.
Physical properties of fresh concrete/mortar
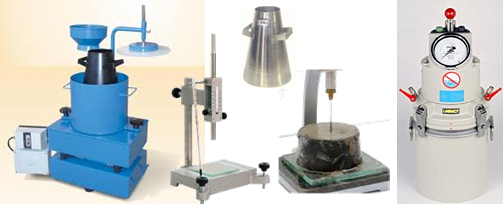
Devices are available in the laboratory for measuring the physical properties of fresh concrete and mortar:
- VEBE test apparatus for measuring the workability of freshly mixed concrete
- VICAT test apparatus for the determination of setting time and soundness of cement, i.e. it determines the water content required to produce the desired consistency
- Air content test devices for mortar and fresh concrete
- Vibro-consistometer for the determination of the workability of concrete
- Shrinkage test devices for mortar and concrete
- Flow tables for mortar and concrete
- Slump test cones for measuring the workability of fresh concrete
Self-compacting concrete
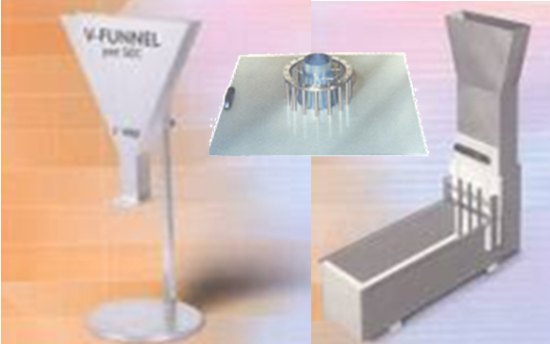
Apparati for measuring the physical properties of self-compacting concrete:
- V-funnel
- L-box
- J-ring
Physical properties of hardened concrete
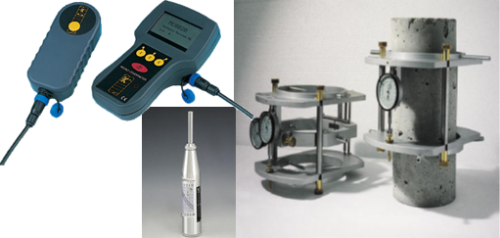
Devices are available in the laboratory for measuring the physical properties of hardened concrete:
- Apparatus for measuring the elastic modulus of concrete cylinders
- Covermeter for locating rebars and measure the exact concrete cover
- Rebound hammer and calibration anvil for rapid determination of the compressive strength of concrete
- Water permeability test
On-site evaluation of strength in concrete constructions
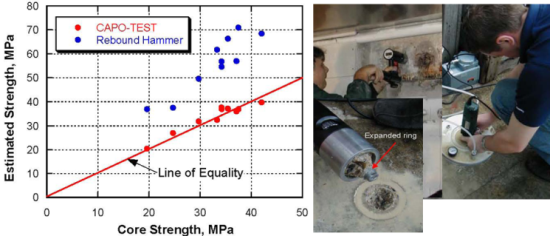
Three systems are available for on-site evaluation of the strength of existing concrete structures as well as of fresh concrete used in constructions by the pull-out method (as per the international standards ASTM C 900, BS 1881: Part 207, EN 12504-3). They are used to evaluate the strength of concrete in the critical area of covering the reinforcement and for assessing the capability of concrete to develop early strength and receive loads (after removing timber framing or during the straining process) during the construction.
(a) The LOK-TEST system (Germann Instruments) allows for on-site measurement of local strength of newly built constructions using pre-installed inserts in the fresh concrete.
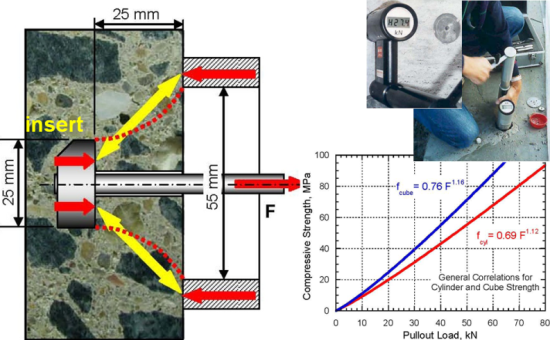
(b) The CAPO-TEST system (Germann Instruments) allows for on-site measurement of local strength in existing concrete structures.
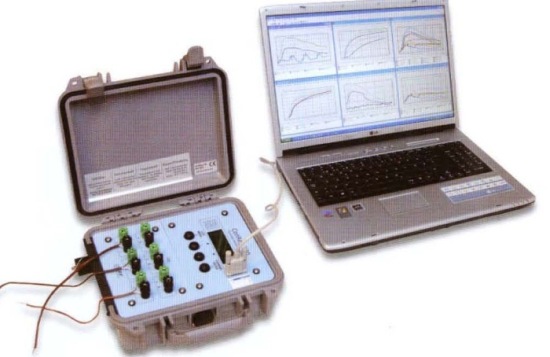
(c) CONReg system (Germann Instruments) for the determination of concrete strength as a function of time using the maturity method (according to standard ASTM C 1074). This system is equipped with 6 channels for simultaneous recording of temperature with thermocouples and micro-processor for measurement of temperature data, calculation of the maturity function and subsequent determination of strength.
Corrosion control
Several systems are available in the MSS-NDE laboratory for evaluating the physical resistance of concrete or mortar to chloride penetration.
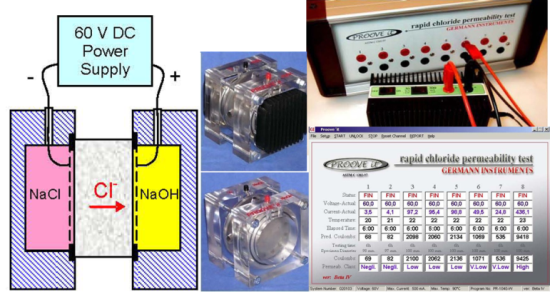
(a) PROOVE-it system for the determination of chloride penetration in saturated concrete by applying electric potential in appropriate specimen according to standards AASHTO T277, ASTM C1202. The PROOVE-it system (Germann Instruments) used to evaluate the resistance of concrete to the ingress of chloride ions in two ways:
- By determining how easy it is to force chloride ions into saturated concrete by applying an electrical potential across a test specimen in accordance with AASHTO T 277 or ASTM C1202. This is known as the “Coulomb Test” or the “Rapid Chloride Permeability Test (RCPT).”
- By measuring the penetration depth of chloride ions, after an electric potential has been applied to the specimen in accordance with NORDTEST BUILD 492 (Chloride Migration Coefficient from Non-Steady State Migration Experiments) to determine the “Chloride Migration Coefficient,” which can be used to estimate the chloride diffusion coefficient for service life calculations.
(b) The Profile Grinder system (Germann Instruments), used to obtain concrete powder by precision grinding at small depth increments for accurate determination of the chloride ion profile for the following applications:
- Following ponding of specimens in the laboratory, e.g., according to NT BUILD 443 or ASTM C1556, or
- On-site on structures that have been subjected to chloride ion ingress.
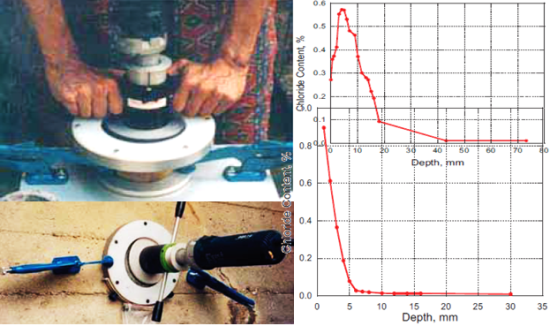
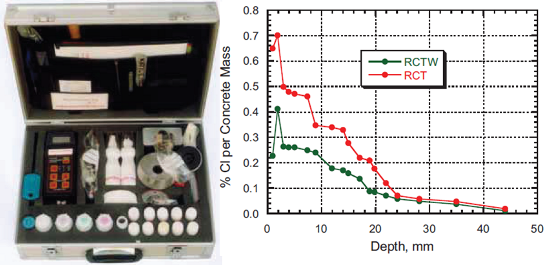
(c) The RCT system (Germann Instruments) to accurately and quickly determine the chloride ion content from powder samples of concrete obtained on-site or in the laboratory. The test results can be used for:
- Establishing the chloride ion profile for service life estimation
- Establishing the depth of removal of a chloride ion contaminated surface layer
- Diagnosing a structure for corrosion activity, in combination with other test systems
- Monitoring the chloride ion content during electrochemical removal of chlorides
- Measuring the chloride ion content of fresh concrete or its constituents
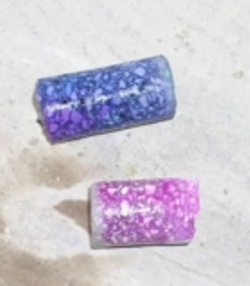
(d) Determination of the Carbonation depth concrete samples, which can be used for the following purposes:
- To evaluate the cause of corrosion when conducting corrosion surveys
- To estimate service life where penetration of the carbonation front is critical
- To monitor the effectiveness of procedures for re-alkalization of the cover layer
- To make a rough estimate of concrete strength from the age of concrete and the relative humidity
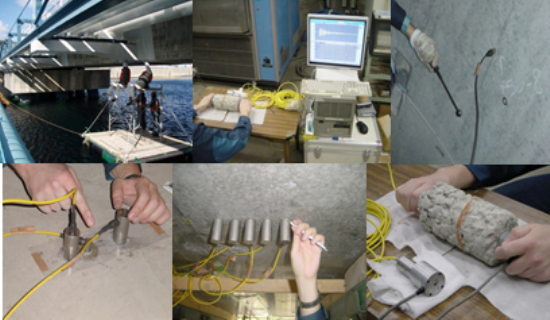
Monitoring the structural integrity of civil structures
Portable Acoustic Emission and ultrasonics system for:
- Crack propagation monitoring
- Real-time detection of damage
- Characterization of structural integrity in concrete structures
Cement reinforced with nano-binders
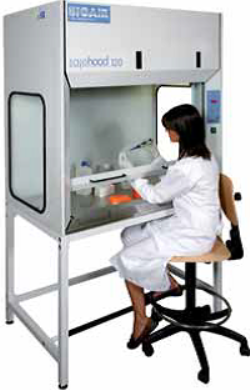
We have the necessary infrastructure to make specimens of concrete, mortar or paste reinforced with nano-binders, such as nano-fibers, CNTs or nano-silica, BIOAIR SAFEHOOD hood with microprocessor controlled airflow and two HEPA filters for safe handling of nano-particles. A high power ultrasonic stirring device, HIELSCHER UP400S, is also available for mixing nano-particles in cement-based materials. It has a power of 400 W, frequency 24 kHz, automatic frequency tuning, with ultrasonic amplitude adjustable 20-100%, pulse adjustable 0-100%, and titanium sonotrode.

Pavement Management of Road Networks
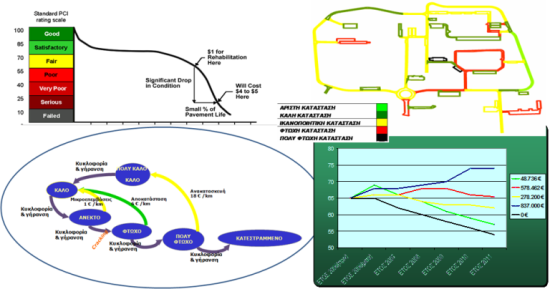
Pavement management consists in recording the condition of pavements through inspection and recording of surface damage. It is based on determination of the Pavement Condition Index (PCI) which reflects the roadway health state. Damage is assessed and maintenance needs are determined. The PCI index ranges from 0 to 100, sorting pavements in 7 different categories according to their state of damage. Specialized software and NDE technology available in the laboratory enable for:
- NDE and recording
- Determination of the present state of pavements
- Using prediction models, and
- Proposing maintenance and repair plans
Milling machines
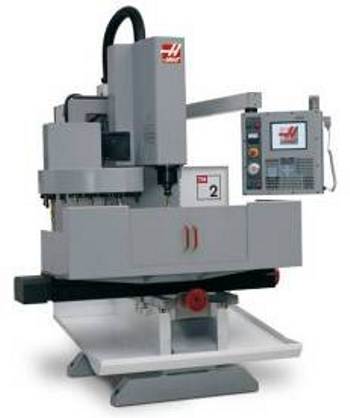
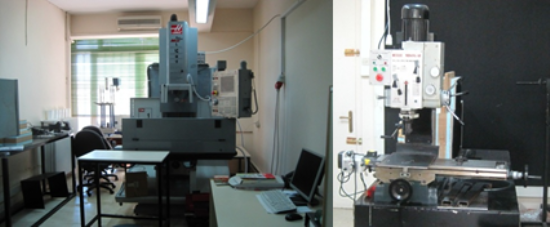
Vertical CNC (Computer Numerical Control) mill HASS ΤΜ-1ΗΕ, 3-axes. axes: 762 x 305 x 406 (Χ/Υ/Ζ). Milling velocity up to 5100 mm/min.
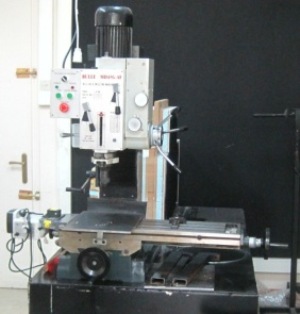
Manual milling machine 45mm 400V, Bulle MD45G.
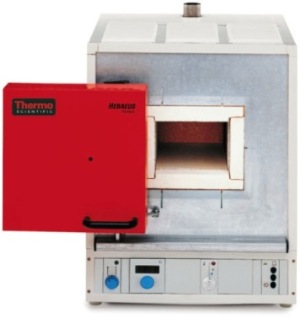
Muffle Furnace
Thermo Fisher/ Heraeus M110 Muffle Furnace for heat treatment of metals, capacity 9 lt., max operating temperature 1100°C, 24-hour timer, exhaust fan, exhaust flue,with Thermicon® P temperature controller with microprocessor.
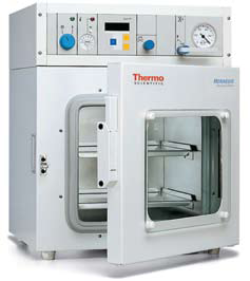
Vacuum Oven
Thermo Electron LED GmbH / Heraeus VT6025 digital Vacuum Oven, capacity 25 lt., with double pane safety glass viewing window, temperature range from 10οC above RT to 200οC controlled by ±1οC, resists pressure of 10-2 mbar, fully programmable.
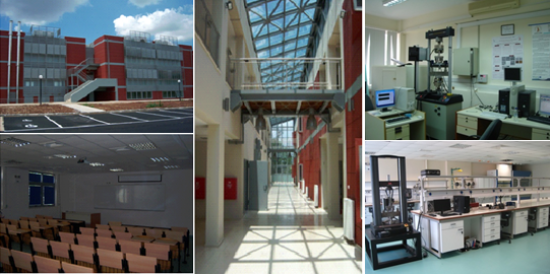
Mechanics & NDE - MSE building
The Mechanics, Nondestructive Evaluation and Smart Sensors facilities are located in the MSE building.
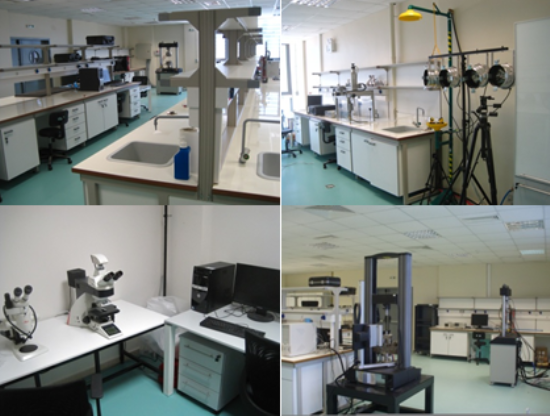
Concrete Technology - E1 building
The Concrete Technology facilities are located in the E1 building.
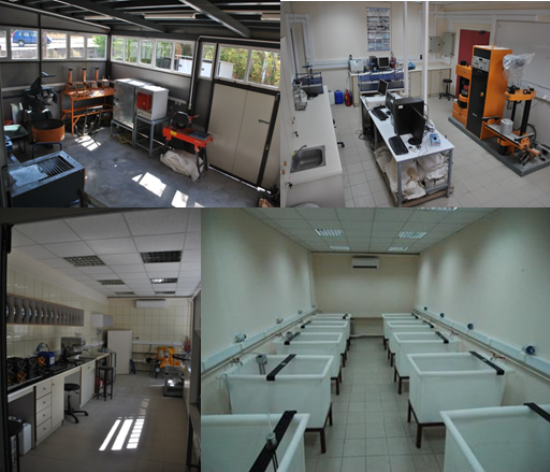
Manufacturing Technology - Administration building
The Manufacturing Technology facilities (mechanical processing and heat treatment) are located in the Administration building.
MSS-NDE Facilities Overview
- Mechanics & NDE - MSE building
- Concrete Technology - E1 building
- Manufacturing Technology - Administration building
Mechanics
- Dynamic servo-hydraulic system INSTRON 8800
- Electro-mechanical testing system INSTRON 5960
- Advanced Video Extensometer
- Erosion Testing
Nondestructive Evaluation (NDE)
- Mid-wave IR Thermography System
- Long-wave IR Thermal Camera
- Ultrasonic System
- Scanning Acoustic Microscopy
- Nonlinear Acoustics System
- Acoustic Emission Systems
- Laser Doppler Vibrometer
- Electrical Measurements
- FBG Sensor Measurement System
- Optical Characterization
Concrete Technology
- Cable Stayed Bridge model
- Specimen fabrication
- Mechanical systems
- Balances
- Curing chamber
- Physical properties of fresh concrete/mortar
- Self-compacting concrete
- Physical properties of hardened concrete
- On-site strength evaluation in concrete constructions
- Corrosion control
- Structural integrity monitoring of civil structures
- Cement reinforced with nano-binders
- Pavement management of road networks


